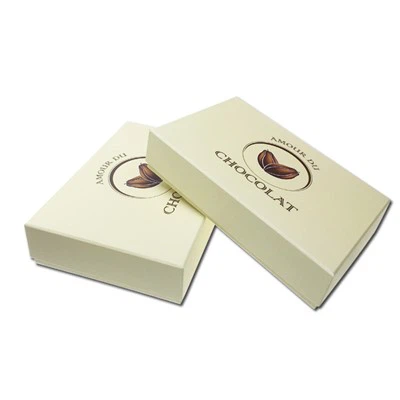
How to Make a Paper Box with a Slide - Out Tray
As a paper box supplier, I've witnessed firsthand the growing demand for unique and functional packaging solutions. One such innovative design is the paper box with a slide - out tray. This type of box not only adds an element of surprise but also provides easy access to the contents inside. In this blog post, I'll guide you through the step - by - step process of making a paper box with a slide - out tray.
Materials Needed
Before we start, let's gather all the necessary materials. You'll need:
- Thick paper or cardboard: The thickness will depend on the size and weight of the items you plan to put in the box. A 2 - 3 mm thick cardboard works well for most general - purpose boxes.
- Ruler: To measure and mark the dimensions accurately.
- Pencil: For marking the cardboard.
- Scissors or a craft knife: For cutting the cardboard.
- Glue or double - sided tape: To assemble the box.
- Bone folder (optional): This helps in creating sharp folds.
Step 1: Design the Box and Tray
The first step is to design the box and the slide - out tray. You can use a piece of scrap paper to sketch out your design. The box will have four sides, a top, and a bottom, while the tray will fit snugly inside the box.
For a simple rectangular box, start by deciding on the length (L), width (W), and height (H) of the box. The tray should be slightly smaller in length and width to ensure it can slide in and out smoothly. A good rule of thumb is to make the tray about 1 - 2 mm smaller in both length and width than the inside dimensions of the box.
Let's assume we want to make a box with the following dimensions:
- Length (L) of the box: 20 cm
- Width (W) of the box: 15 cm
- Height (H) of the box: 10 cm
The tray's dimensions would then be approximately:
- Length of the tray: 19.8 cm
- Width of the tray: 14.8 cm
- Height of the tray: 8 cm (to allow some space at the top when it's inside the box)
Step 2: Mark and Cut the Cardboard
Using your ruler and pencil, mark the dimensions on the cardboard. For the box, you'll need to mark out a large rectangle that will form the four sides and the top and bottom of the box. The length of this rectangle will be (2L + 2W), and the width will be (H+L).
Draw lines on the cardboard to indicate where you'll fold to form the sides, top, and bottom. Use a bone folder or the edge of a ruler to score the lines lightly. This will make it easier to fold the cardboard neatly.
For the tray, mark out a smaller rectangle with the dimensions we calculated earlier. Cut out both the box and the tray shapes using scissors or a craft knife. Be careful when using the craft knife to avoid any injuries.


Step 3: Fold the Cardboard
Start by folding the box along the scored lines. Use your fingers to make sharp, clean folds. For the corners, you can use a bone folder to ensure a perfect 90 - degree angle.
The tray is folded in a similar way. Make sure all the folds are straight and tight. This will ensure the box and the tray have a professional look.
Step 4: Assemble the Box and Tray
Now it's time to assemble the box and the tray. Apply glue or double - sided tape to the flaps of the cardboard. For the box, start by joining the two ends of the rectangle to form a tube. Then, fold the bottom flaps and secure them with glue or tape.
The tray is assembled in the same way. Once both the box and the tray are assembled, test the fit. The tray should slide in and out of the box smoothly. If it's too tight, you can sand the edges of the tray slightly to make it fit better.
Step 5: Add Finishing Touches
You can customize your paper box with a slide - out tray in many ways. You can print a design on the cardboard before cutting it, or you can add stickers, ribbons, or other decorative elements after assembly.
If you're using the box for commercial purposes, you might be interested in our Nail Packaging Box or Boxes For Packiging options. We also offer Packaging Boxes Custom Logo services, which can help your brand stand out.
Advantages of a Paper Box with a Slide - Out Tray
There are several advantages to using a paper box with a slide - out tray. Firstly, it provides easy access to the contents. Customers can simply slide out the tray to view and retrieve the items inside. This is especially useful for products that need to be displayed or handled carefully.
Secondly, it adds an element of surprise and luxury. The slide - out feature makes the unboxing experience more exciting, which can enhance the customer's perception of your brand.
Finally, paper boxes are eco - friendly. They are made from renewable resources and can be recycled, which is an important consideration in today's environmentally conscious market.
Conclusion
Making a paper box with a slide - out tray is a fun and rewarding project. Whether you're a DIY enthusiast or a business owner looking for unique packaging solutions, this type of box can be a great option.
As a paper box supplier, we have the expertise and resources to help you create high - quality paper boxes with slide - out trays. If you're interested in purchasing our products or discussing custom packaging solutions, we'd love to hear from you. Contact us to start a conversation about your packaging needs.
References
- "Packaging Design: Principles and Practice" by Margaret C. Hagan
- "The Craft of Cardboard Box Making" by various authors in the DIY community